1. What is GSTR-1 and Who Must File It?
GSTR-1 is a monthly (or quarterly) outward supply return where you declare all your sales to the government. The data you file is auto-populated into your buyers' GSTR-2B for their Input Tax Credit claims.
| Taxpayer Type | Filing Frequency | Due Date |
|---|---|---|
| Regular Taxpayer (Monthly) | Every month | 11th of next month |
| QRMP Scheme (Quarterly) | Every quarter | 13th after quarter ends |
| Nil Return (zero sales) | Monthly — still mandatory | 11th of next month |
| New Registration | From registration month | 11th of next month |
2. Due Dates — Month-wise (FY 2025–26)
File GSTR-1 for a month by the 11th of the following month. For example, sales in January 2026 must be filed by 11 February 2026.
| Return Period | Due Date (Monthly) | Status |
|---|---|---|
| April 2025 | 11 May 2025 | Filed |
| May 2025 | 11 June 2025 | Filed |
| June 2025 | 11 July 2025 | Filed |
| July 2025 | 11 August 2025 | Filed |
| August 2025 | 11 September 2025 | Filed |
| September 2025 | 11 October 2025 | Filed |
| October 2025 | 11 November 2025 | Filed |
| November 2025 | 11 December 2025 | Filed |
| December 2025 | 11 January 2026 | Filed |
| January 2026 | 11 February 2026 | Filed |
| February 2026 | 11 March 2026 | Filed |
| March 2026 | 11 April 2026 | Filed |
| April 2026 | 11 May 2026 | Due Soon |
| May 2026 | 11 June 2026 | Upcoming |
QRMP Scheme — Quarterly Due Dates (FY 2025-26)
| Quarter | Period | Due Date |
|---|---|---|
| Q1 | April – June 2025 | 13 July 2025 |
| Q2 | July – September 2025 | 13 October 2025 |
| Q3 | October – December 2025 | 13 January 2026 |
| Q4 | January – March 2026 | 13 April 2026 |
3. How to Select the Correct Financial Year
Selecting the wrong Financial Year (FY) on the GST portal is one of the most common mistakes — it files your return under the wrong period and is very difficult to reverse.
India's Financial Year: April to March
| Sales Month | Select Financial Year | Example |
|---|---|---|
| April 2024 – March 2025 | 2024-25 | Sales in May 2024 → FY 2024-25 |
| April 2025 – March 2026 | 2025-26 | Sales in January 2026 → FY 2025-26 |
| April 2026 – March 2027 | 2026-27 | Sales in April 2026 → FY 2026-27 |
4. Step-by-Step Filing Process
Log in, navigate, enter data, preview, and file — here's exactly what to do at each screen.
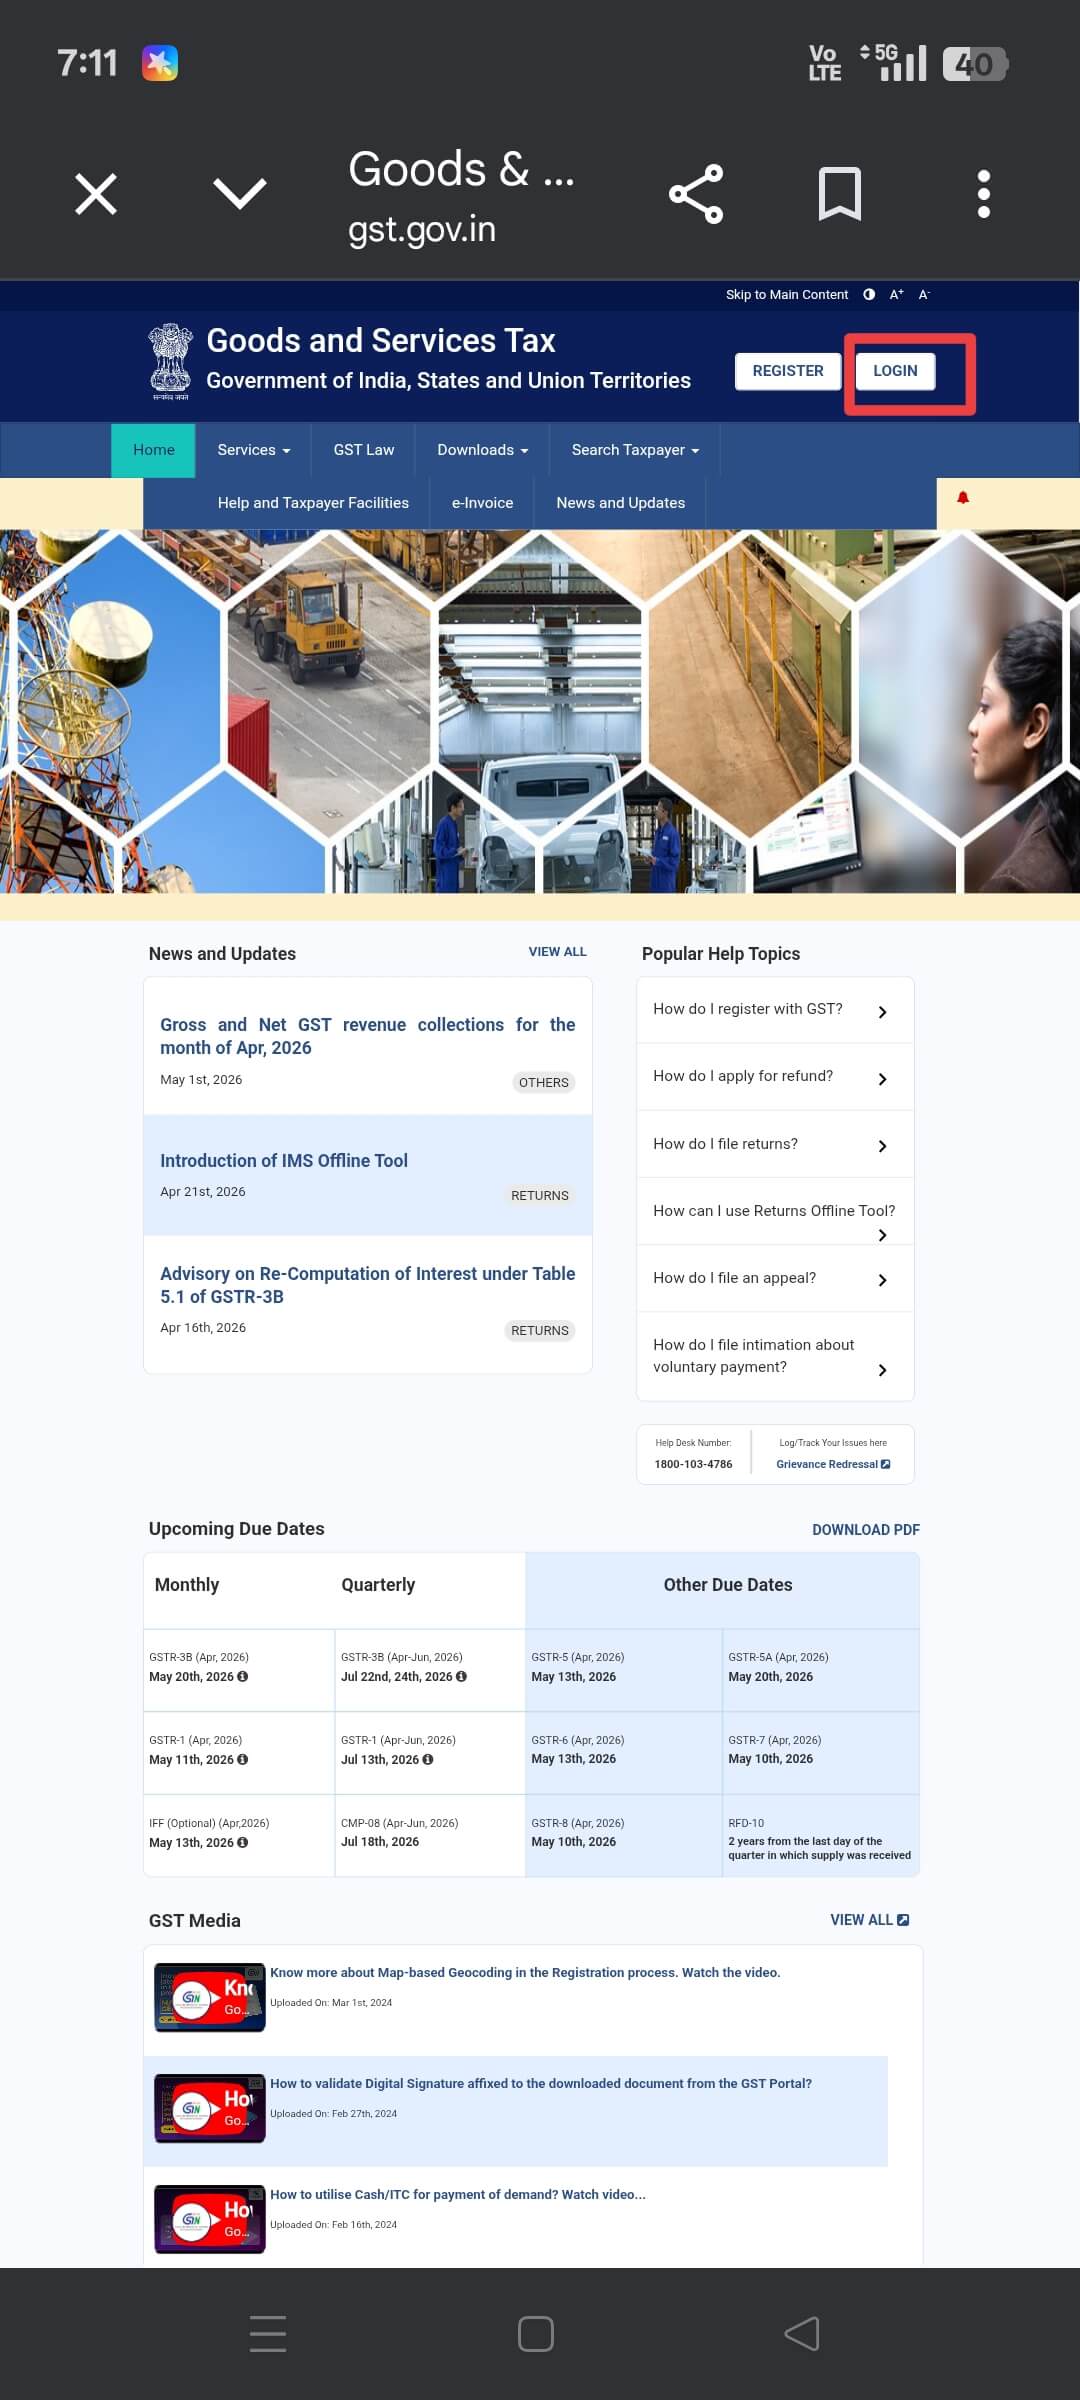
Open gst.gov.in in your browser. Click "Login" at the top right, enter your Username, Password, and Captcha, then click Login.
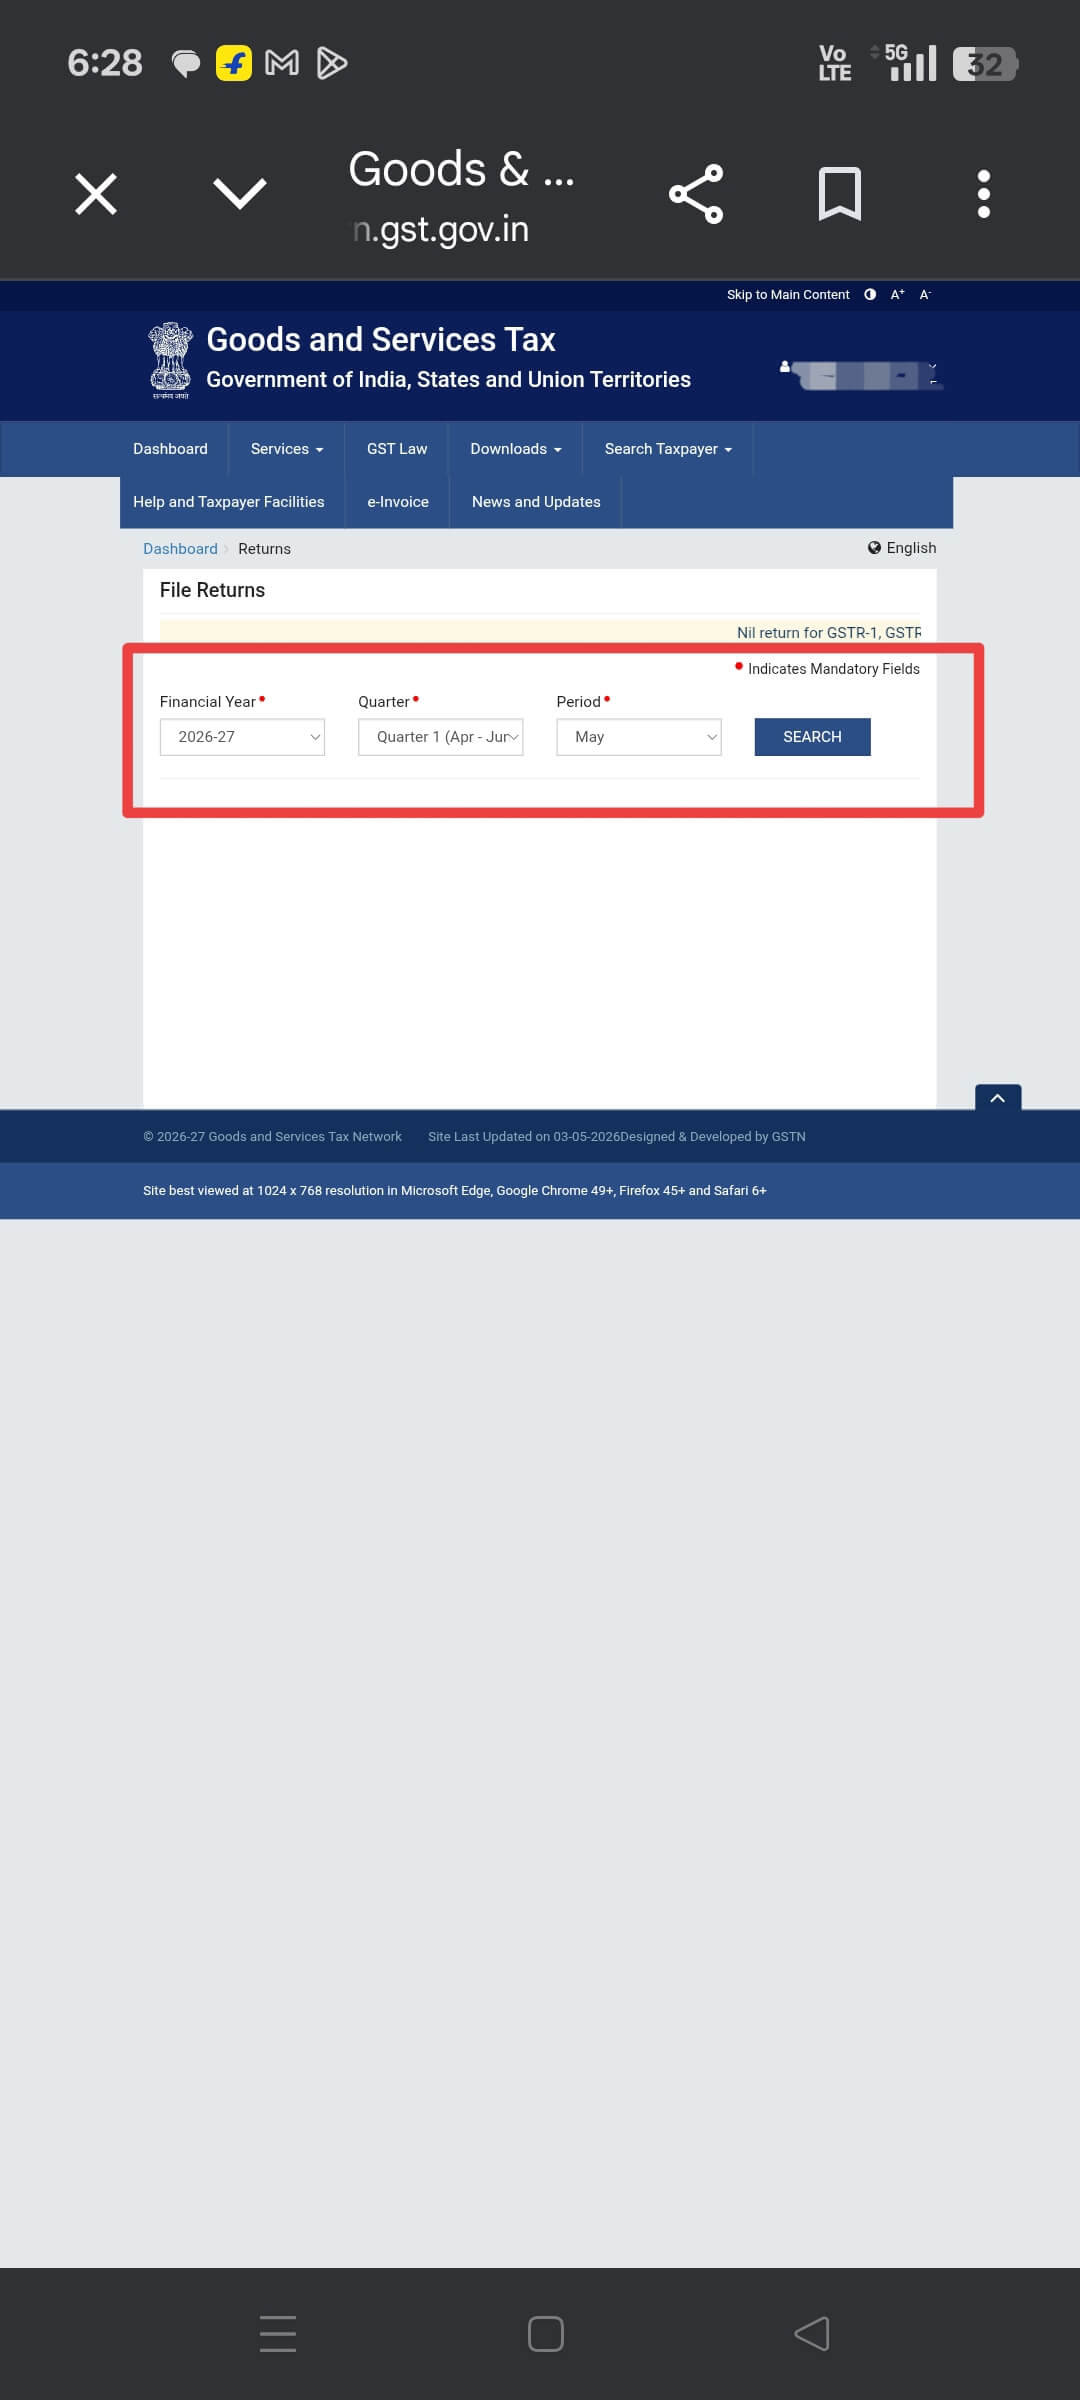
After logging in, go to Services → Returns → Returns Dashboard. Select the Financial Year and Return Period (month) from the dropdowns.
| Filing For | Select FY | Select Period |
|---|---|---|
| Sales in January 2026 | 2025-26 | January |
| Sales in April 2025 | 2025-26 | April |
| Sales in March 2025 | 2024-25 | March |
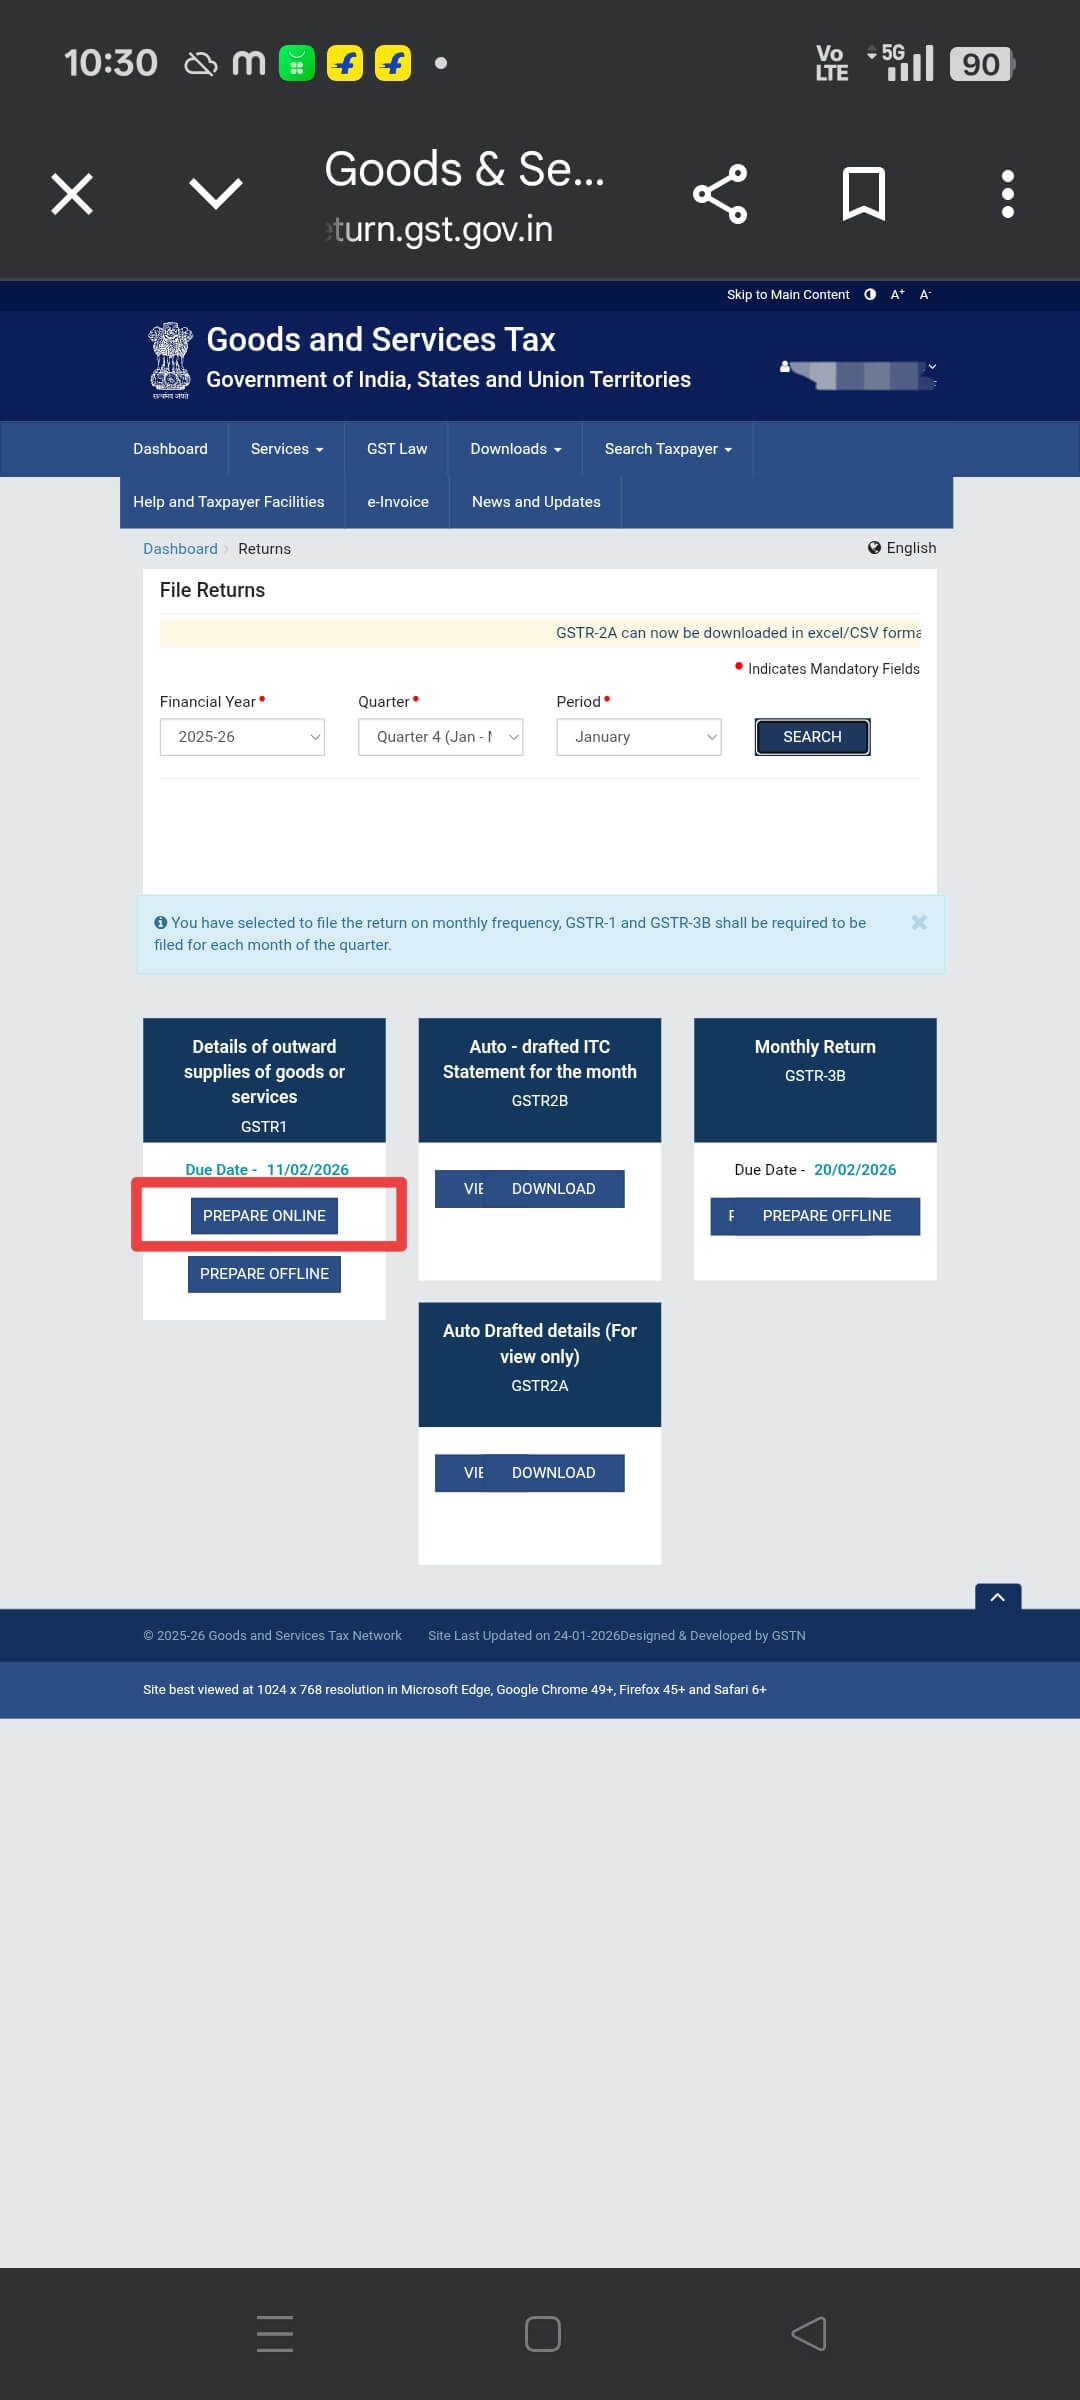
The GSTR-1 tile will appear on the dashboard. Click on it, then select "Prepare Online" to enter data directly on the portal.
Sales to individual consumers on online platforms go into Table 7 — B2C Others (invoice value below ₹2.5 lakh).
| Field | What to Enter | Example |
|---|---|---|
| Type of Supply | Intra-state (CGST+SGST) or Inter-state (IGST) | Seller in Assam, buyer in Delhi → Inter-state (IGST) |
| Place of Supply | Buyer's state | Delhi, Maharashtra, West Bengal |
| Rate of Tax | Product's applicable GST rate | 5%, 12%, 18%, 28% |
| Taxable Value | Sale value excluding GST | ₹10,000 (MRP ₹10,500 at 5% GST) |
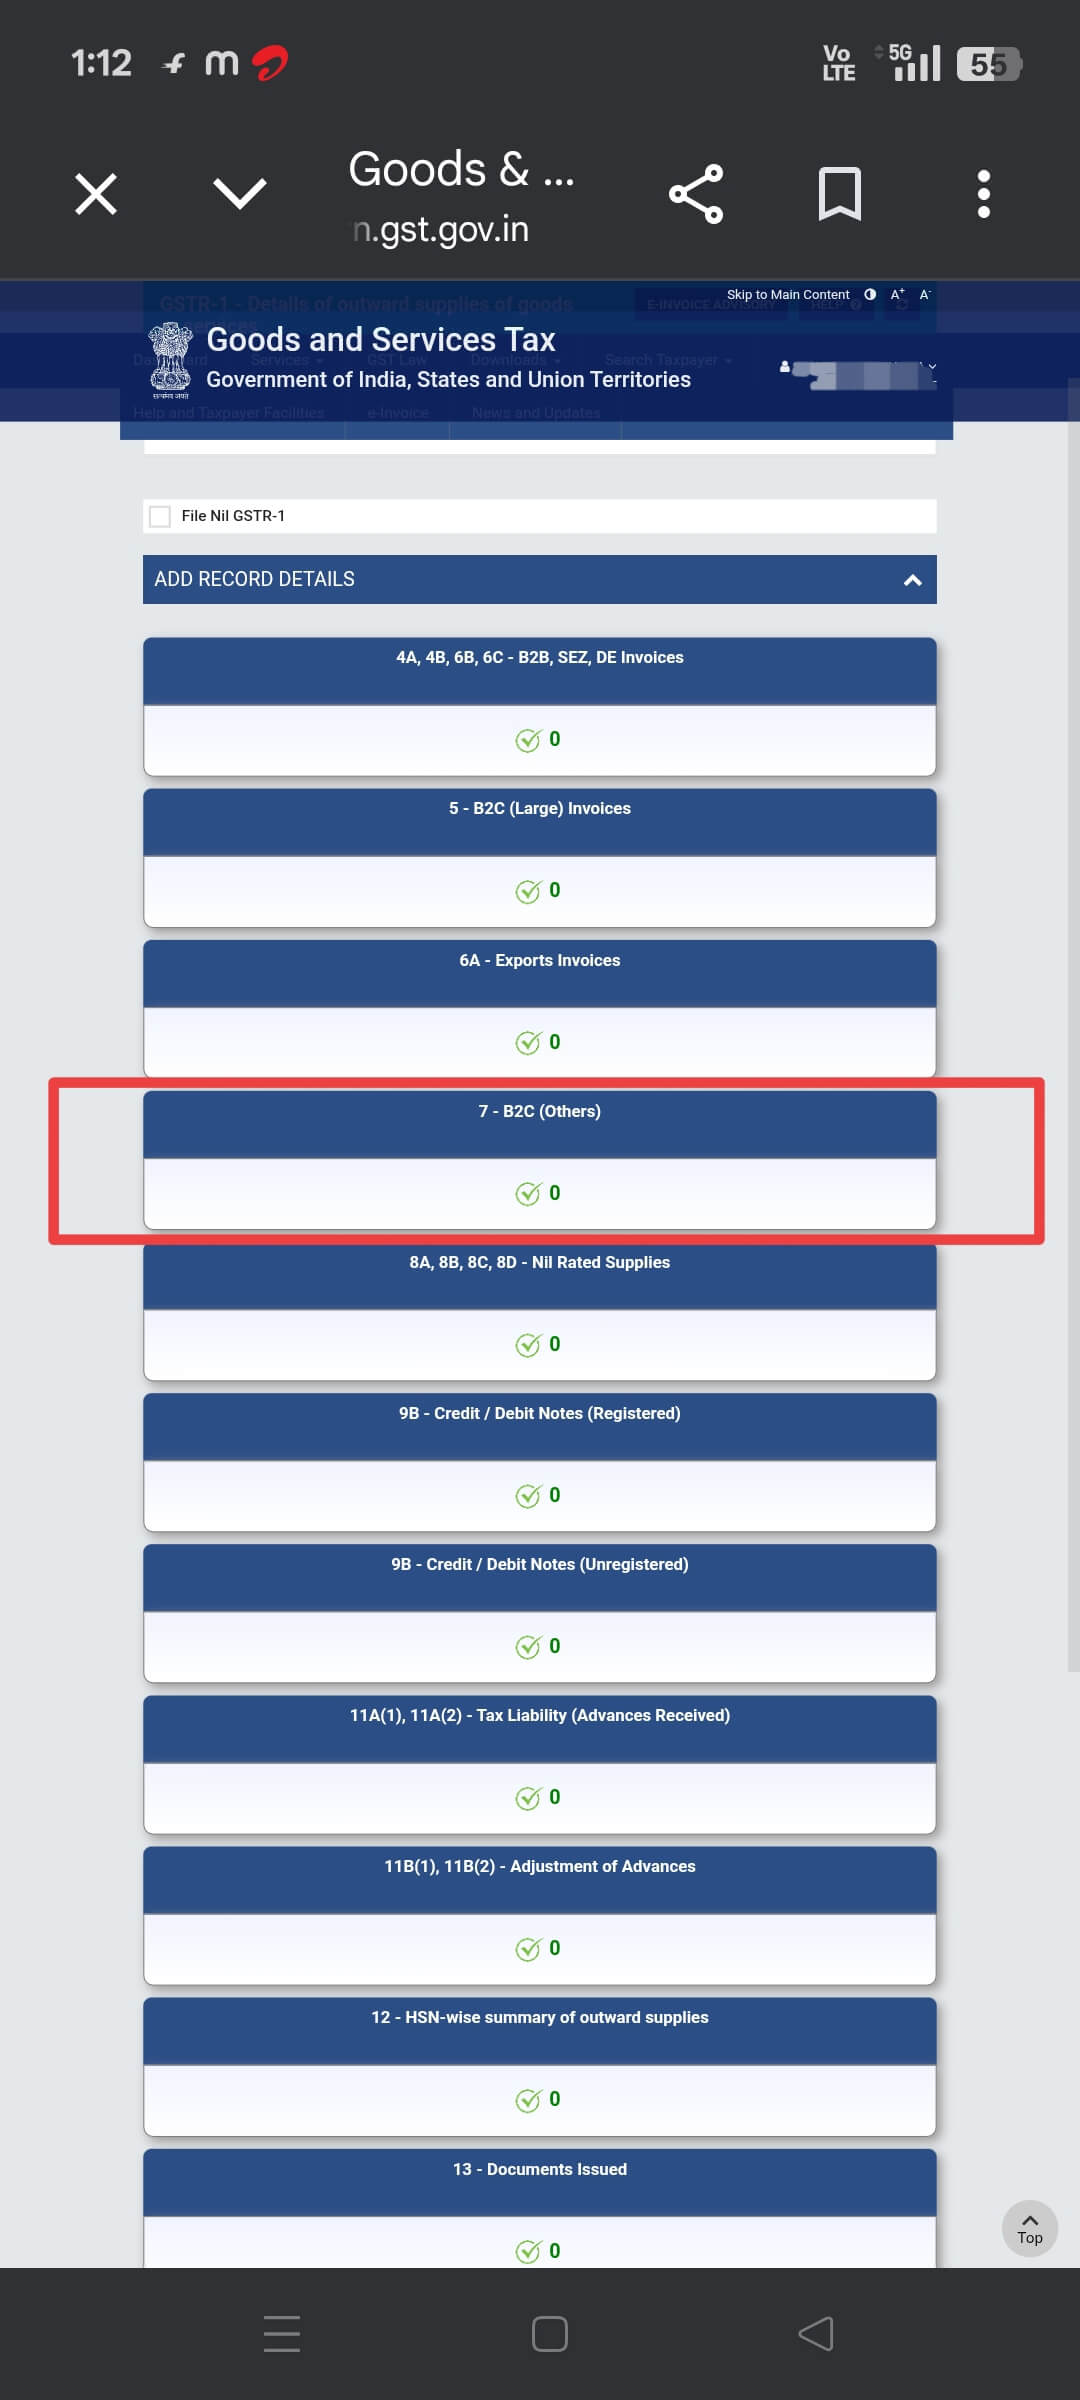
If you sold goods to a GST-registered business, those go into Table 4A (B2B supplies). Enter the buyer's GSTIN, invoice number, date, value, HSN code, and tax rate.
If you sell any nil-rated or exempt products (e.g. unbranded food items, fresh produce), declare those in Table 8 — even though no tax applies.
| Supply Type | Example Products | Table |
|---|---|---|
| Nil Rated (0% GST) | Unbranded flour, rice, salt | Table 8 |
| Exempted | Fresh fruits, vegetables | Table 8 |
| Non-GST Supply | Alcohol, petroleum | Table 8 |
HSN (Harmonized System of Nomenclature) is an international product code. In Table 12, group all your sales by HSN code and enter totals for each.
| Annual Turnover | Required HSN Digits | Example |
|---|---|---|
| Below ₹5 Crore | 4-digit HSN | 6109 (T-shirts) |
| Above ₹5 Crore | 6-digit HSN | 610910 (T-shirts, cotton) |
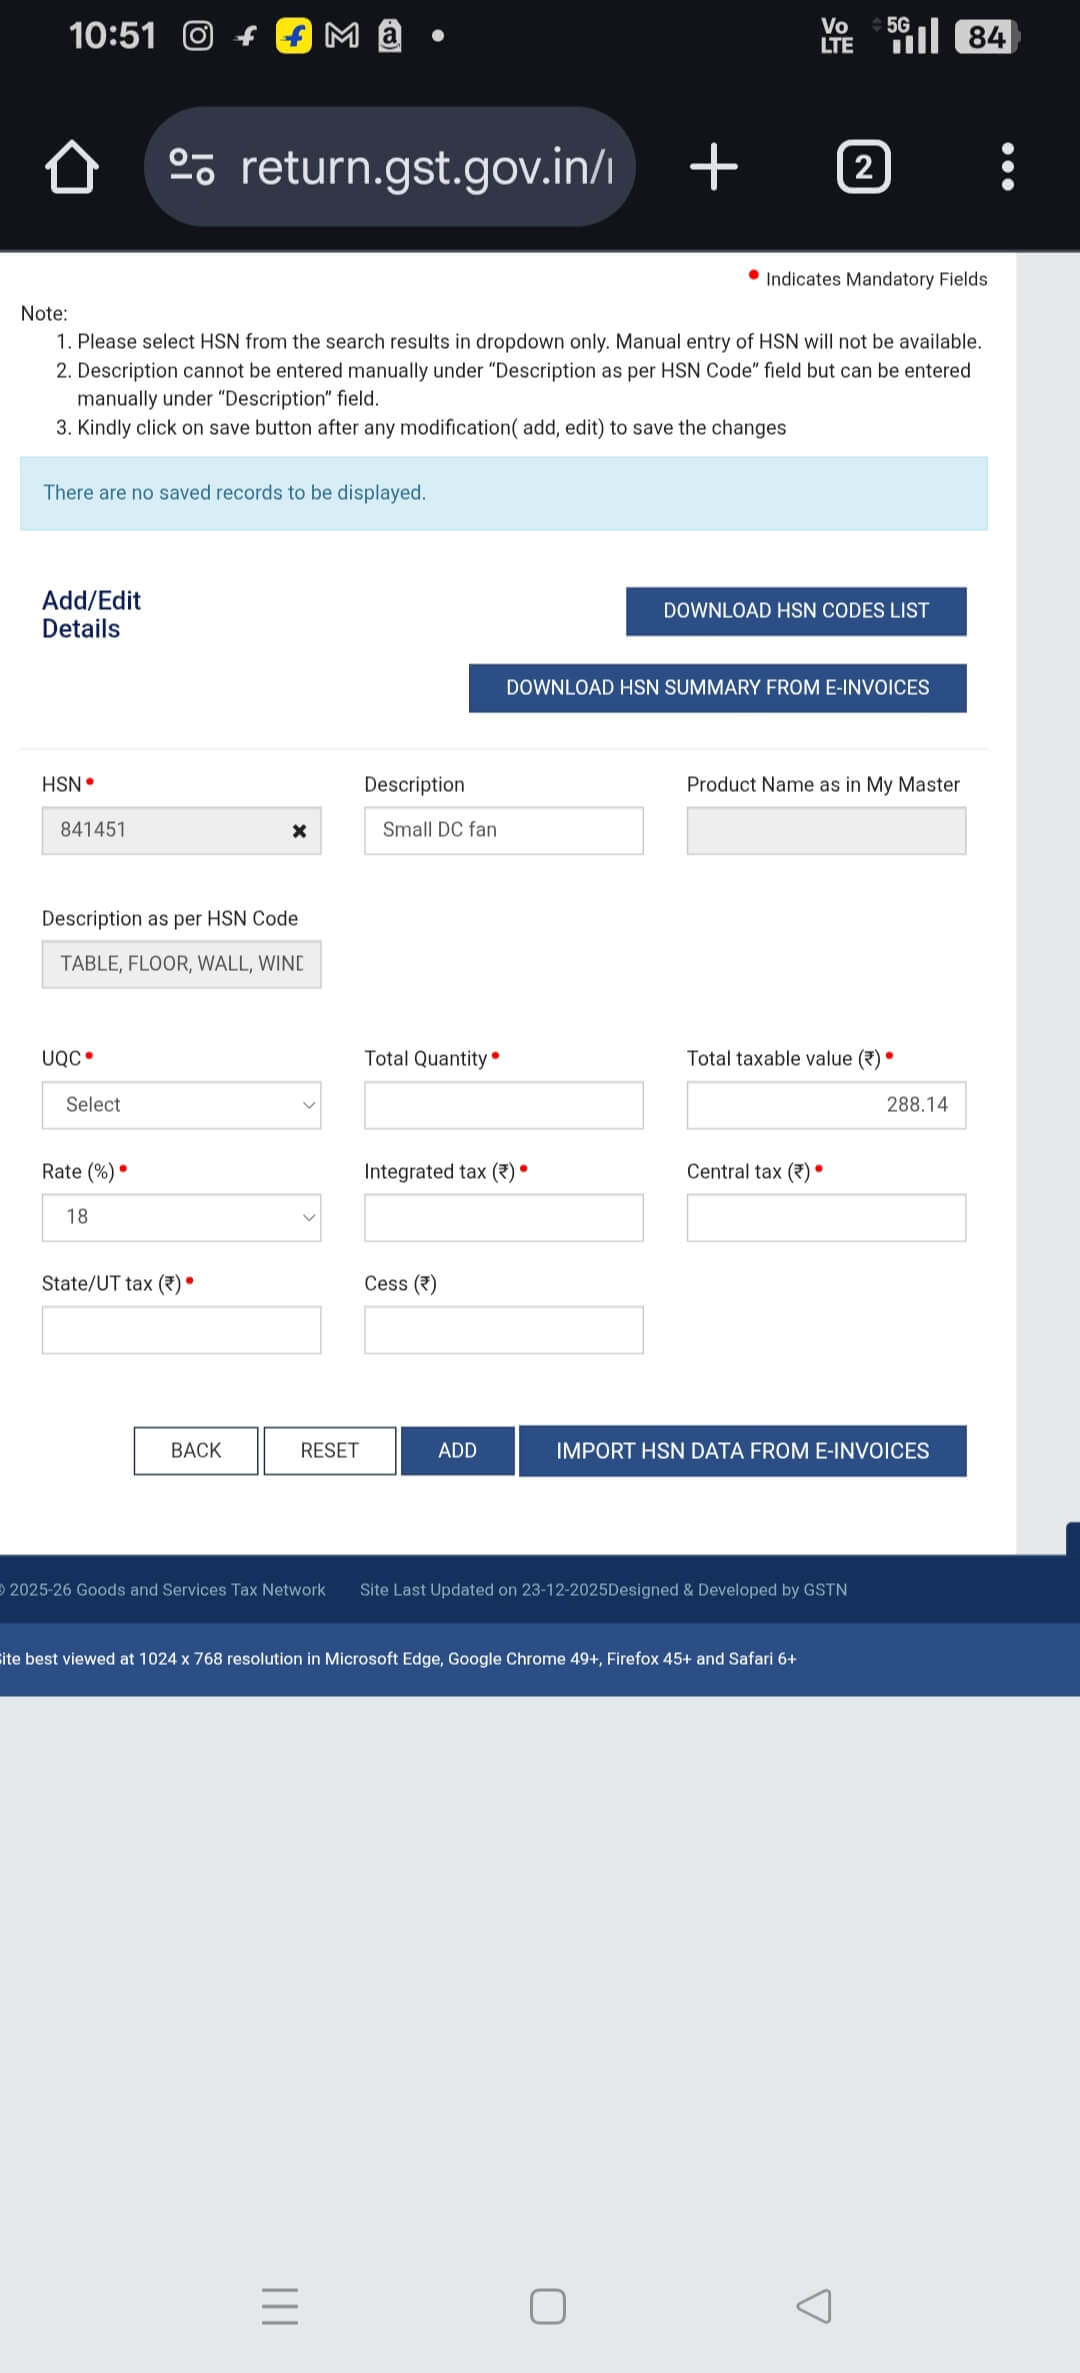
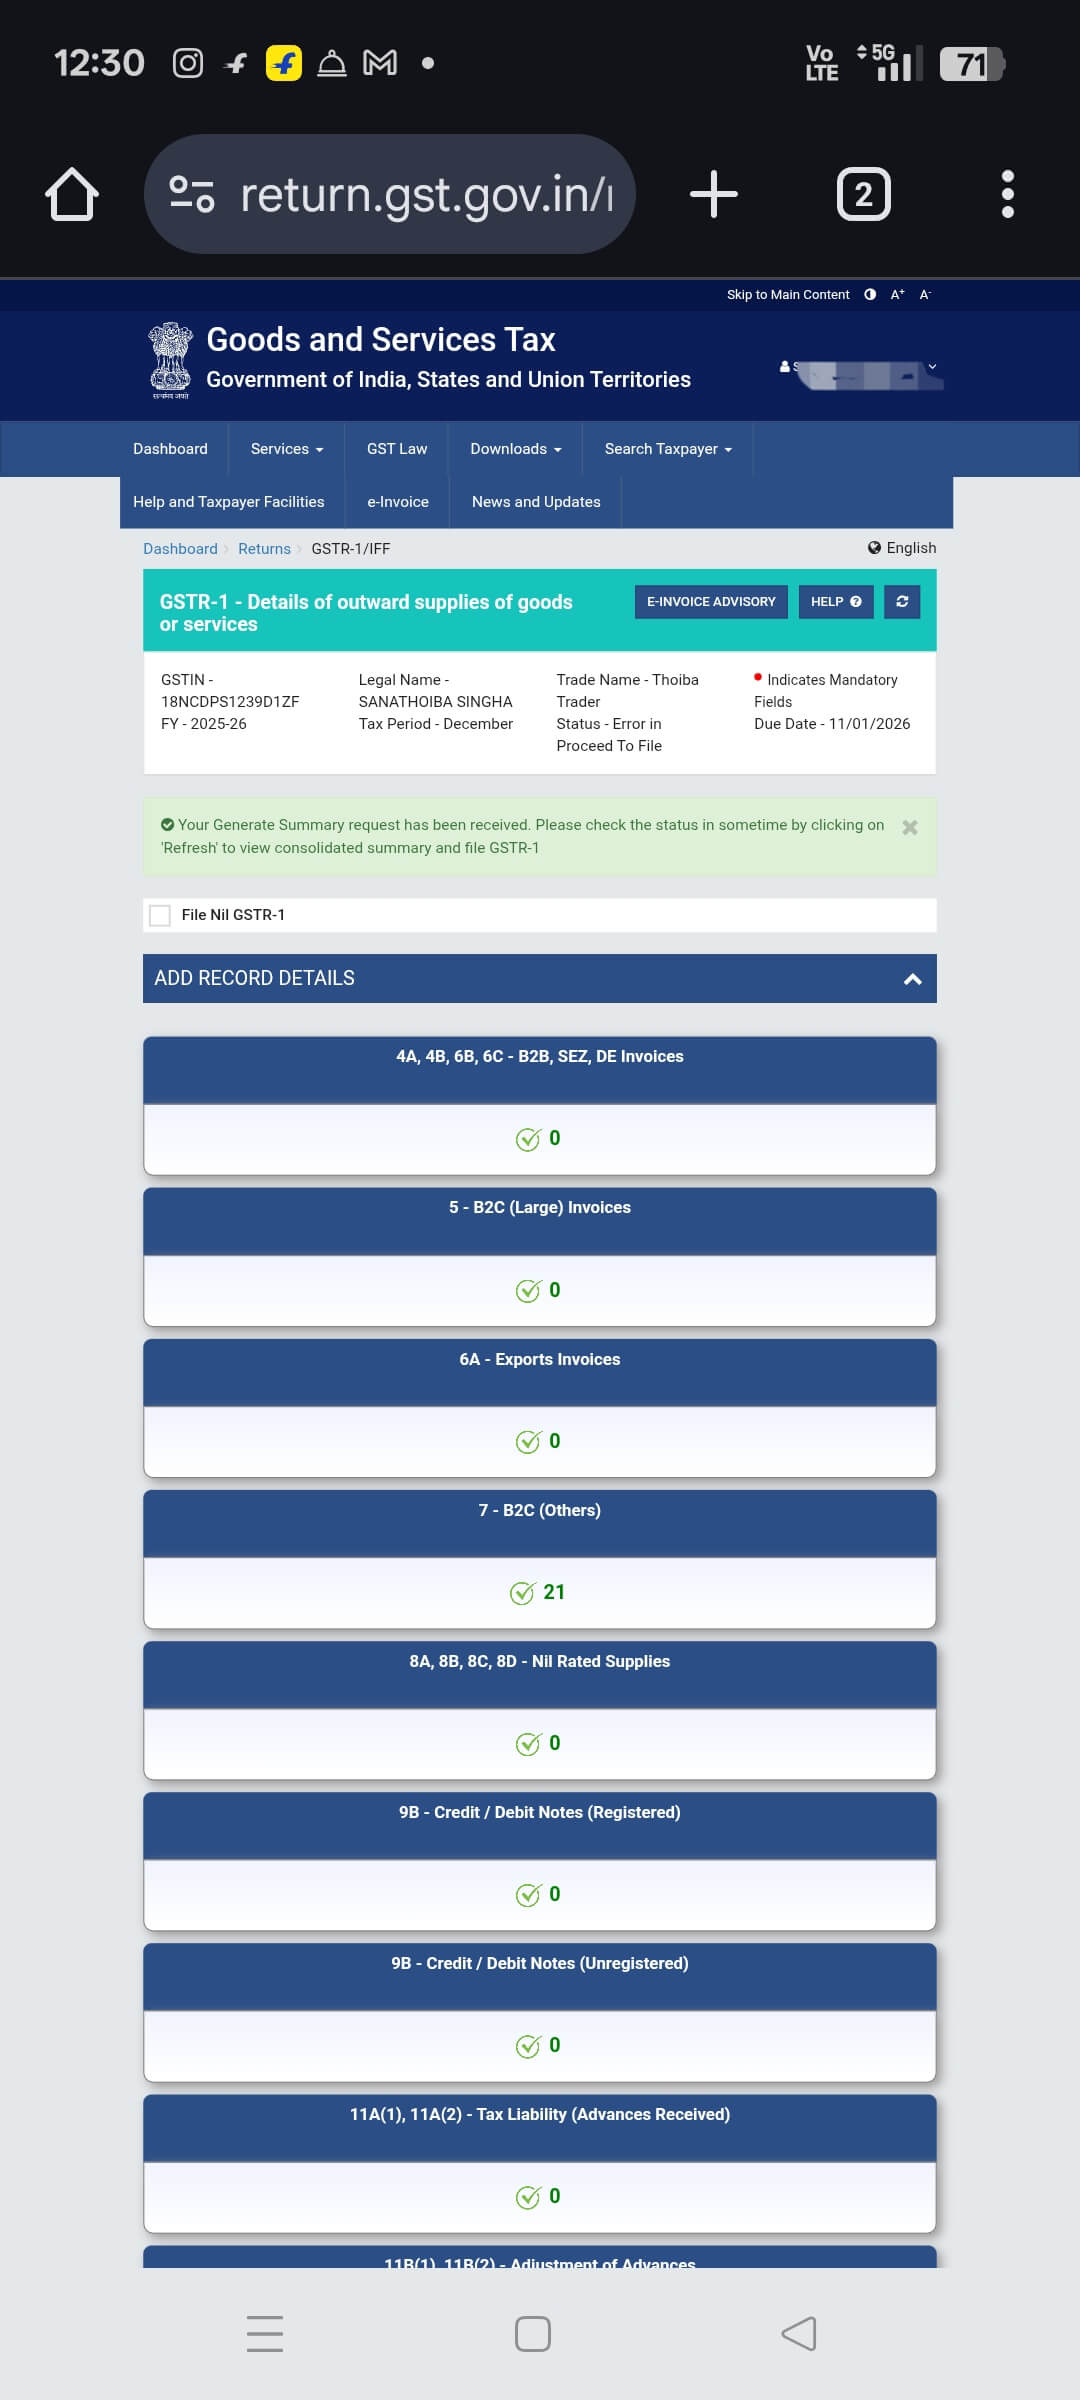
After entering all data, click "Generate Summary". The portal takes a moment to process — refresh the page and wait about 1 minute before the next button activates. Then click "Preview" to download a PDF of all your entries.
Verify in the preview PDF:
- Is the total taxable value correct?
- Are CGST + SGST / IGST amounts right?
- Have all states and HSN codes been covered?
- Have RTO returns been deducted from gross sales?
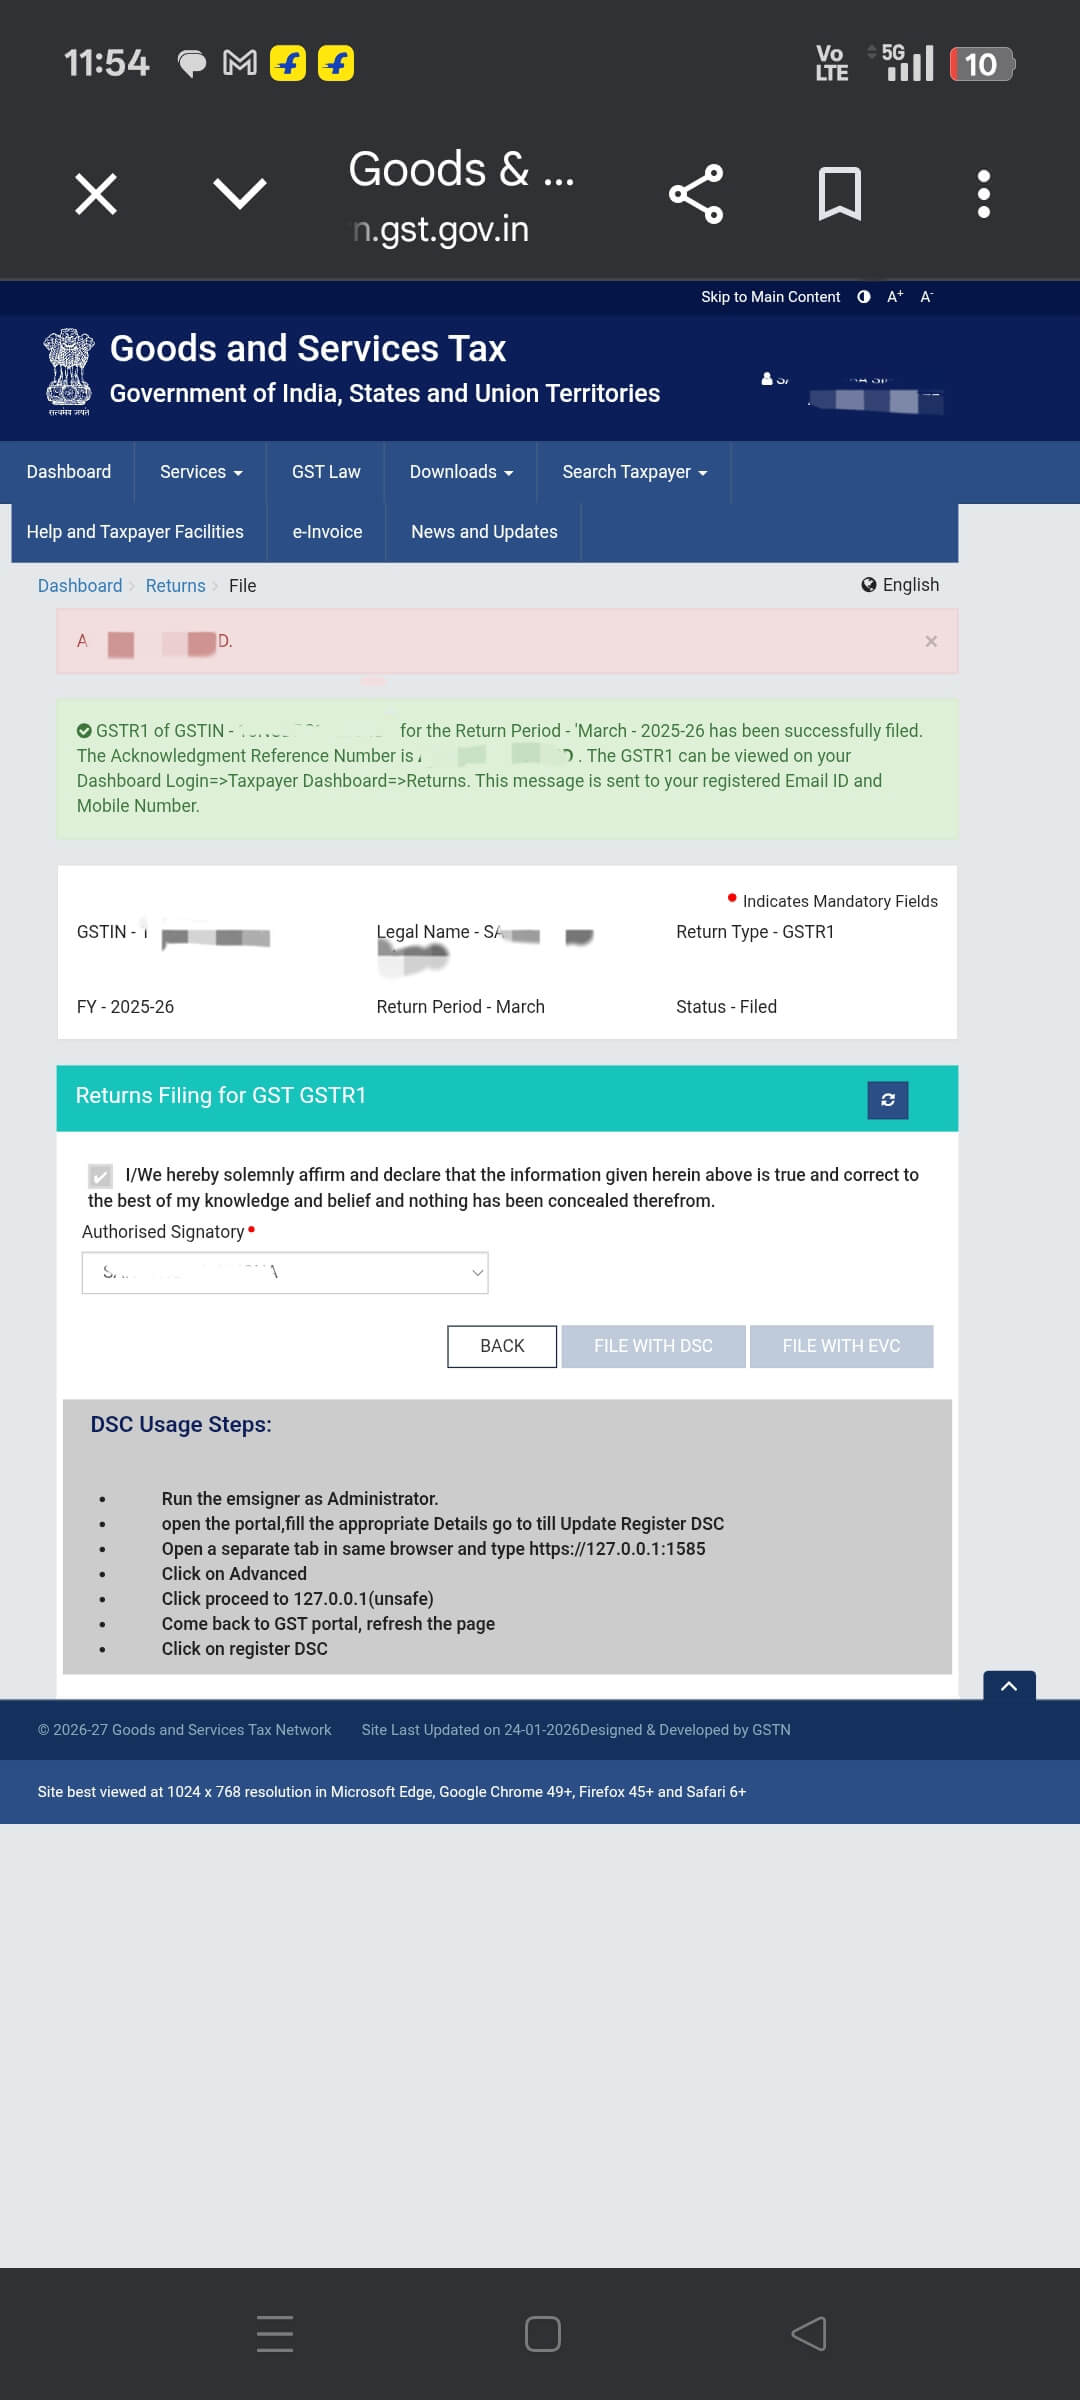
Once the preview looks correct, click "Submit" — this locks your data. Then click "File Return" and choose a verification method:
- EVC (Electronic Verification Code): An OTP is sent to your Aadhaar-linked mobile. Enter it to file. This is the easiest method for most sellers.
- DSC (Digital Signature Certificate): Use your USB DSC token if available.
5. Table 13 — Documents Issued
Table 13 is one of the most commonly skipped yet important sections of GSTR-1. It requires a summary of all documents issued during the return period — tax invoices, bills of supply, credit notes, and debit notes.
| Document Type | When Issued | Example |
|---|---|---|
| Tax Invoice (B2B) | Selling to a GST-registered business | Wholesale to a registered shop |
| Tax Invoice (B2C) | Selling taxable goods to a consumer | Meesho / Amazon / Flipkart order |
| Bill of Supply | Nil-rated or exempt goods | Unbranded atta, fresh vegetables |
| Credit Note | Returns or cancellations | RTO return → credit note issued |
| Debit Note | Additional charge applies | Short-billed invoice revised upward |
How to Fill Table 13
| Field | What to Enter |
|---|---|
| Sr. No. (From) | First invoice number of the period |
| Sr. No. (To) | Last invoice number of the period |
| Total Number | Auto-calculated by portal |
| Cancelled | Number cancelled — enter 0 if none |
| Net Issued | Total − Cancelled (auto-calculated) |
6. Filing on a Phone? Here's What Actually Works
The GST portal was built for desktops — but with the right settings, a phone works fine.
Not everyone has a laptop. If you only have a phone, don't panic — I've filed from a phone myself. But there's one setting you absolutely cannot skip.
The first time I tried filing from my phone in normal browser mode, I couldn't even edit the state-wise data in Table 7. The edit option just wouldn't open. I spent 20 minutes trying to figure out what I was doing wrong. Turns out the problem wasn't me — it was the mobile view of the portal.
The fix was simple: I went to my browser settings, turned on "Desktop Site", and the portal started working exactly like it does on a laptop. If you're on mobile, this is the first thing to do — before you even login.
📱 How to Enable Desktop Mode
- Chrome (Android): Tap the three-dot menu (⋮) → check "Desktop site"
- Safari (iPhone): Tap the "AA" icon in the address bar → "Request Desktop Website"
- Samsung Browser: Tap the three-line menu → Settings → "Desktop mode"
My Pen-Paper Method — Filing Without Errors on a Small Screen
When you're switching between tabs on a phone, mistakes happen. You copy a wrong number, you miss a state, you enter the same entry twice. Here's the system I use that has never failed me:
Before I open the GST portal, I sit down with a notebook and write out every number I need to enter — state-wise sales, taxable values, tax amounts, invoice ranges. Everything. On paper.
Then, as I fill each entry on the portal, I put a tick mark next to it in my notebook. That way, even if I accidentally close a tab or my phone rings in the middle, I know exactly where I left off. No entry gets entered twice, no state gets missed.
It sounds old-school, but on a single-screen phone, this method is faster and safer than constantly switching between apps. A ₹10 notebook has saved me from ₹10,000 penalties.
7. Pre-Filing Checklist — Do This Before Hitting "File"
Once you click Submit in GSTR-1, the data is locked. Corrections can only be made in the next month's return. So this step matters.
✅ Final Checklist Before Filing
8. Late Fee and Interest
Missed the due date? Here is what the government charges:
| Taxpayer Type | Late Fee Per Day | Maximum Cap | Interest |
|---|---|---|---|
| Normal Taxpayer (Sales occurred) | ₹50/day (₹25 CGST + ₹25 SGST) | ₹10,000 | 18% p.a. |
| Nil Return (Zero sales) | ₹20/day (₹10 CGST + ₹10 SGST) | ₹500 | — |
| Small Taxpayer (Turnover <₹1.5 Cr) | ₹50/day | ₹2,000 (relaxed) | 18% p.a. |
9. Frequently Asked Questions
For monthly filers, the due date is the 11th of the following month. GSTR-1 for January 2026 → due by 11 February 2026. For QRMP (quarterly) filers, it is the 13th after the quarter ends.
No. The GST portal does not accept marketplace reports directly. You need to extract taxable values, split them state-wise and rate-wise, and enter manually — or use our GSTR-1 Calculator to do it automatically.
Yes. A Nil GSTR-1 must be filed even for zero-sales months. Select "File Nil Return" on the portal — it takes under 2 minutes. Skipping attracts a late fee of ₹20 per day.
Deduct returned orders (RTOs) from your gross sales and report only net sales in Table 7 (B2C). Filing gross sales without deducting RTOs results in overpayment of tax.
Yes — but you must use Desktop Mode in your browser. Normal mobile view breaks the portal's editing functionality. Open Chrome, tap the three-dot menu, and check "Desktop site" before logging in.
Taxpayers with annual turnover below ₹5 crore can opt for the QRMP (Quarterly Return Monthly Payment) scheme — file GSTR-1 quarterly instead of monthly. You still need to pay tax monthly via Form PMT-06.
GSTR-1 cannot be revised after filing. Correct the mistake in the next month's GSTR-1 using the Amendment Tables — Table 9A (B2B), 9B (credit/debit notes), 9C (B2C).
The late fee auto-reflects in your next GSTR-3B under the "Late Fee" section. Pay from your Electronic Cash Ledger on the portal. It must be cleared before filing the pending GSTR-1.